Implementing Android mini navigation drawer

24 Jan 2016

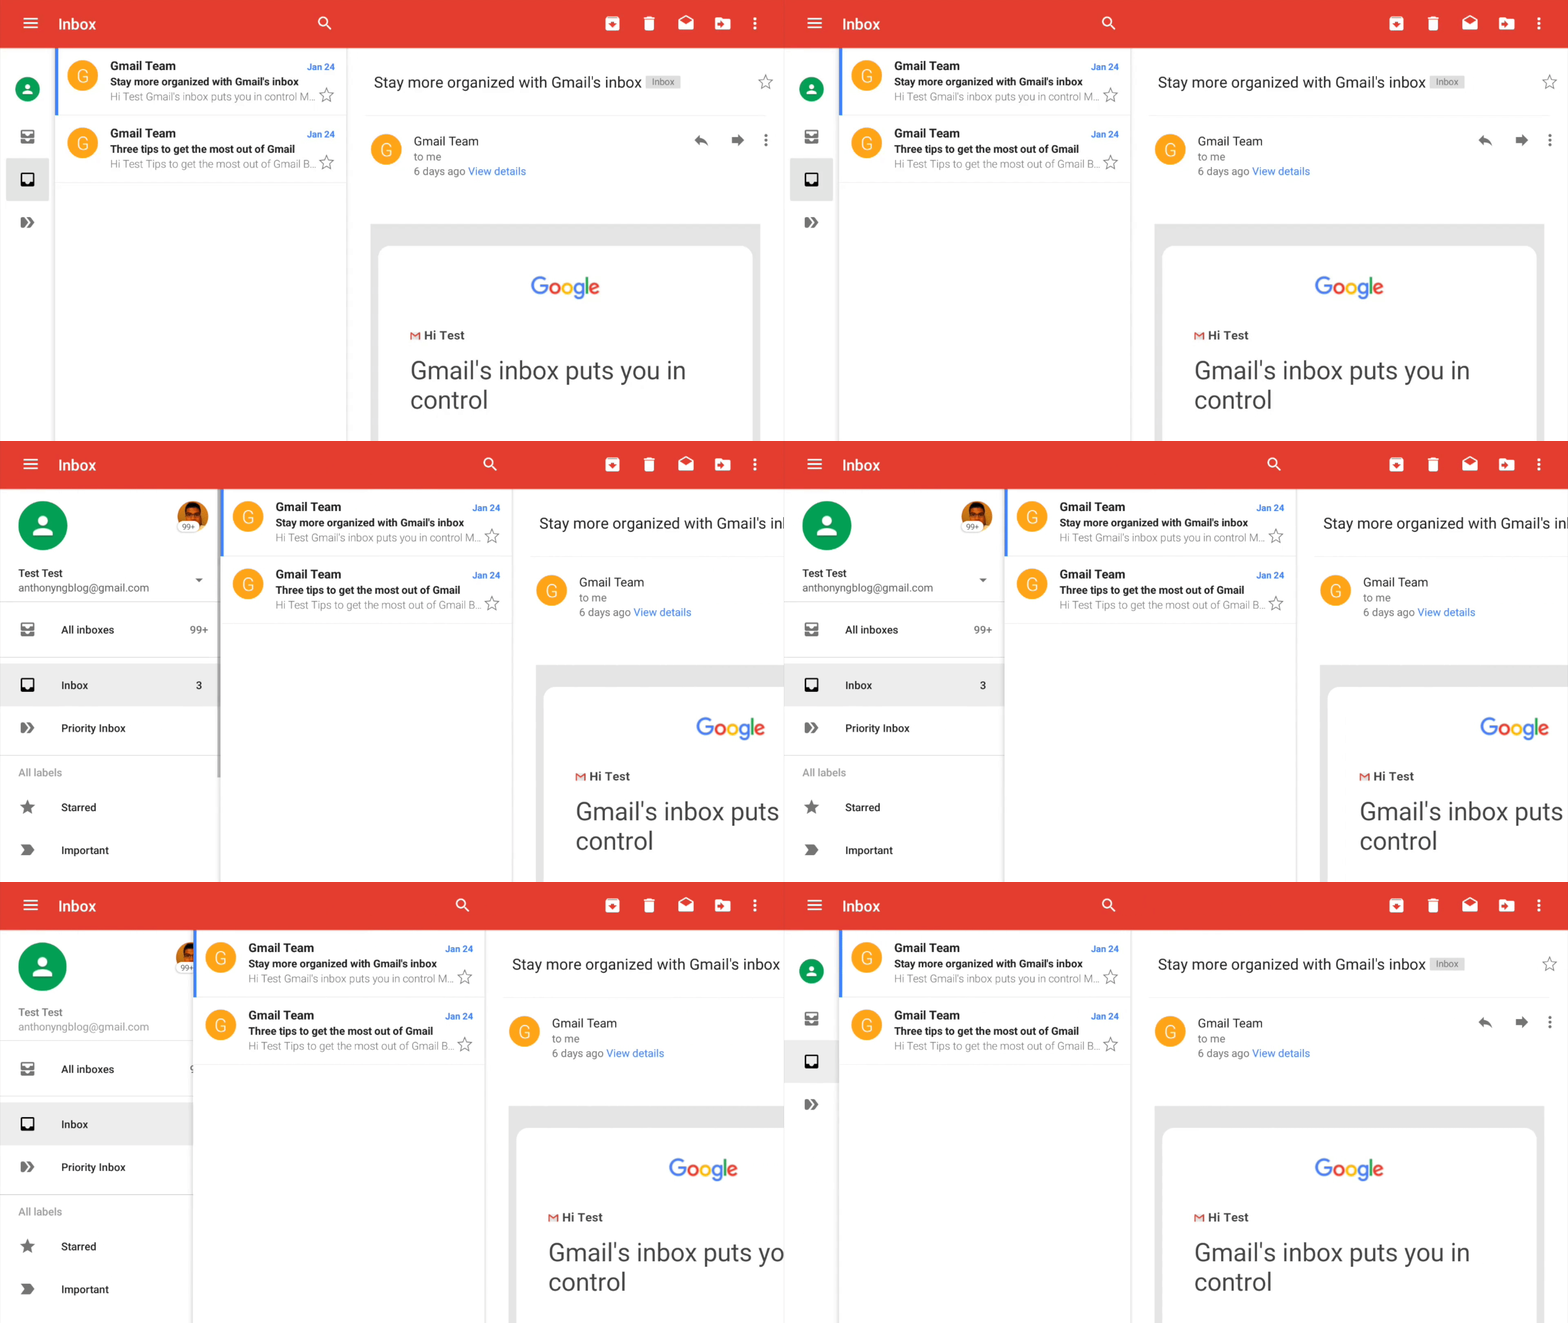
The Gmail app for Android tablets on Lollipop and above introduces a new navigation drawer called the mini navigation drawer. This variant of the navigation drawer allows the menu icons to be visible when the drawer is in the collapsed state. The mini navigation drawer is also specified in Google’s material design guidelines.
title for image

Example of a mini navigation drawer

Unfortunately, there are no built in Android libraries to support this type of navigation drawer. The good news is we can use a layout called SlidingPaneLayout to implement this feature.

Create a layout resource file and set SlidingPaneLayout as your parent view. SlidingPaneLayout requires two child views: a master view and a detail view. The master view will contain a list of all our menu options and the detail view will contain the content.

<?xml version="1.0" encoding="utf-8"?>
<android.support.v4.widget.SlidingPaneLayout
xmlns:android="http://schemas.android.com/apk/res/android"
android:layout_width="match_parent"
android:layout_height="match_parent"
android:orientation="horizontal">
<!--Master fragment-->
<fragment
android:name="com.ng.anthony.mininavigationdrawer.MasterFragment"
android:layout_width="220dp"
android:layout_height="match_parent"
android:id="@+id/fragment_master">
</fragment>
<!--Detail layout -->
<FrameLayout
android:layout_width="1000dp"
android:layout_height="match_parent"
android:layout_weight="1">
</FrameLayout>
</android.support.v4.widget.SlidingPaneLayout>

The master view is contained inside a fragment. When creating multi pane layouts, it is good practice to separate your panes in fragments. This keeps the code modular and each pane is contained in its own layout file. Add the master fragment class to your project.

package com.ng.anthony.mininavigationdrawer;
import android.os.Bundle;
import android.support.v4.app.ListFragment;
import android.view.LayoutInflater;
import android.view.View;
import android.view.ViewGroup;
/**
* Created by Anthony on 16-01-25.
*/
public class MasterFragment extends ListFragment {
public View onCreateView (LayoutInflater inflater, ViewGroup container, Bundle savedInstanceState) {
View view = inflater.inflate(R.layout.fragment_master, container);
setListAdapter(new MenuListAdapter(R.layout.row_menu_action_item, getActivity(), MenuActionItem.values()));
return view;
}
}

Add the master fragment layout to your layout resources folder.

<?xml version="1.0" encoding="utf-8"?>
<LinearLayout xmlns:android="http://schemas.android.com/apk/res/android"
android:orientation="vertical" android:layout_width="match_parent"
android:layout_height="match_parent">
<ListView
android:id="@android:id/list"
android:layout_width="match_parent"
android:layout_height="match_parent"
android:background="@android:color/darker_gray"
android:divider="@null">
</ListView>
</LinearLayout>

The master fragment contains a list view and uses an enumeration of menu options to populate the list.

package com.ng.anthony.mininavigationdrawer;
/**
* Created by Anthony on 16-01-25.
*/
public enum MenuActionItem {
ITEM1,
ITEM2,
ITEM3,
ITEM4,
ITEM5
}

The master fragment also contains a custom array adapter that displays the list of menu options. The custom array adapter inflates a row layout for each menu option.

package com.ng.anthony.mininavigationdrawer;
import android.app.Activity;
import android.view.MenuItem;
import android.view.View;
import android.view.ViewGroup;
import android.widget.ArrayAdapter;
import android.widget.ImageView;
import android.widget.TextView;
import java.util.ArrayList;
/**
* Created by Anthony on 16-01-25.
*/
public class MenuListAdapter extends ArrayAdapter<MenuActionItem> {
int resource;
Activity activity;
public MenuListAdapter(int resource, Activity activity, MenuActionItem[] items) {
super(activity, resource, items);
this.resource = resource;
this.activity = activity;
}
public View getView (int position, View convertView, ViewGroup parent) {
View rowView = convertView;
if(rowView == null) {
rowView = activity.getLayoutInflater().inflate(resource, null);
MenuItemViewHolder viewHolder = new MenuItemViewHolder();
viewHolder.menuItemImageView = (ImageView)rowView.findViewById(R.id.menu_item_image_view);
viewHolder.menuItemTextView = (TextView)rowView.findViewById(R.id.menu_item_text_view);
rowView.setTag(viewHolder);
}
MenuItemViewHolder holder = (MenuItemViewHolder)rowView.getTag();
if(position == MenuActionItem.ITEM1.ordinal()) {
holder.menuItemImageView.setImageDrawable(activity.getDrawable(R.drawable.ic_payment_white_24dp));
holder.menuItemTextView.setText(activity.getResources().getString(R.string.item1));
}
else if(position == MenuActionItem.ITEM2.ordinal()) {
holder.menuItemImageView.setImageDrawable(activity.getDrawable(R.drawable.ic_pets_white_24dp));
holder.menuItemTextView.setText(activity.getResources().getString(R.string.item2));
}
else if(position == MenuActionItem.ITEM3.ordinal()) {
holder.menuItemImageView.setImageDrawable(activity.getDrawable(R.drawable.ic_receipt_white_24dp));
holder.menuItemTextView.setText(activity.getResources().getString(R.string.item3));
}
else if(position == MenuActionItem.ITEM4.ordinal()) {
holder.menuItemImageView.setImageDrawable(activity.getDrawable(R.drawable.ic_shopping_cart_white_24dp));
holder.menuItemTextView.setText(activity.getResources().getString(R.string.item4));
}
else if(position == MenuActionItem.ITEM5.ordinal()) {
holder.menuItemImageView.setImageDrawable(activity.getDrawable(R.drawable.ic_work_white_24dp));
holder.menuItemTextView.setText(activity.getResources().getString(R.string.item5));
}
return rowView;
}
private static class MenuItemViewHolder {
public ImageView menuItemImageView;
public TextView menuItemTextView;
}
}

Add the row layout.

<?xml version="1.0" encoding="utf-8"?>
<LinearLayout xmlns:android="http://schemas.android.com/apk/res/android"
android:orientation="horizontal" android:layout_width="match_parent"
android:layout_height="match_parent"
android:padding="16dp"
android:gravity="center_vertical">
<ImageView
android:id="@+id/menu_item_image_view"
android:layout_width="24dp"
android:layout_height="24dp"
android:layout_marginRight="16dp"/>
<TextView
android:id="@+id/menu_item_text_view"
android:layout_width="wrap_content"
android:layout_height="wrap_content"
android:textSize="16sp"
android:textColor="@android:color/white"/>
</LinearLayout>

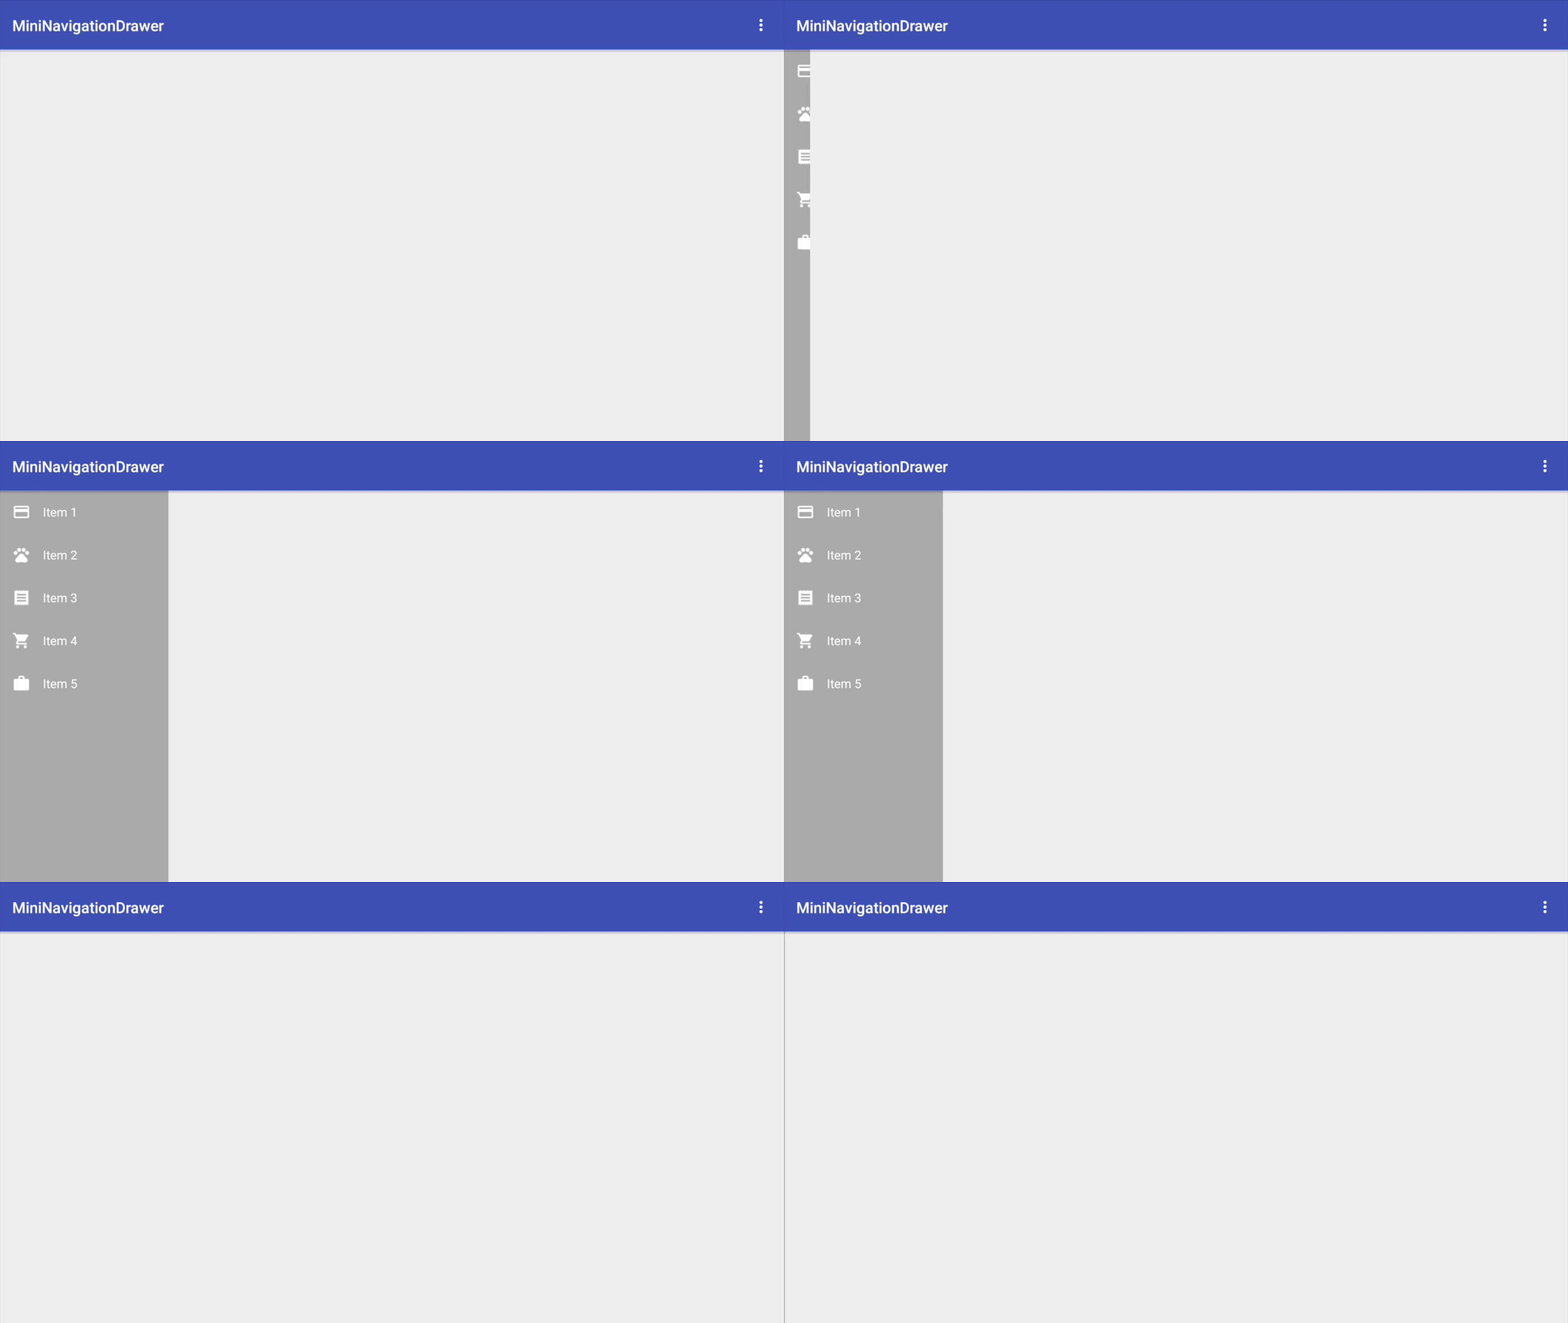
Run your project and you should see something like this. When you swipe your finger right, the master layout will appear.
title for image

Example of SlidingPaneLayout

To show the menu icons when the drawer is in the collapsed state, we simply add a margin left to the detail view. This shifts the detail view to the right revealing a portion of the master layout that is hidden underneath the detail view when the SlidingPaneLayout is in the collapsed state.

<?xml version="1.0" encoding="utf-8"?>
<android.support.v4.widget.SlidingPaneLayout
xmlns:android="http://schemas.android.com/apk/res/android"
android:layout_width="match_parent"
android:layout_height="match_parent">
<!--Master fragment-->
<fragment
android:name="com.ng.anthony.mininavigationdrawer.MasterFragment"
android:layout_width="220dp"
android:layout_height="match_parent"
android:id="@+id/fragment_master">
</fragment>
<!--Detail layout -->
<FrameLayout
android:layout_width="1000dp"
android:layout_height="match_parent"
android:layout_marginLeft="56dp">
</FrameLayout>
</android.support.v4.widget.SlidingPaneLayout>

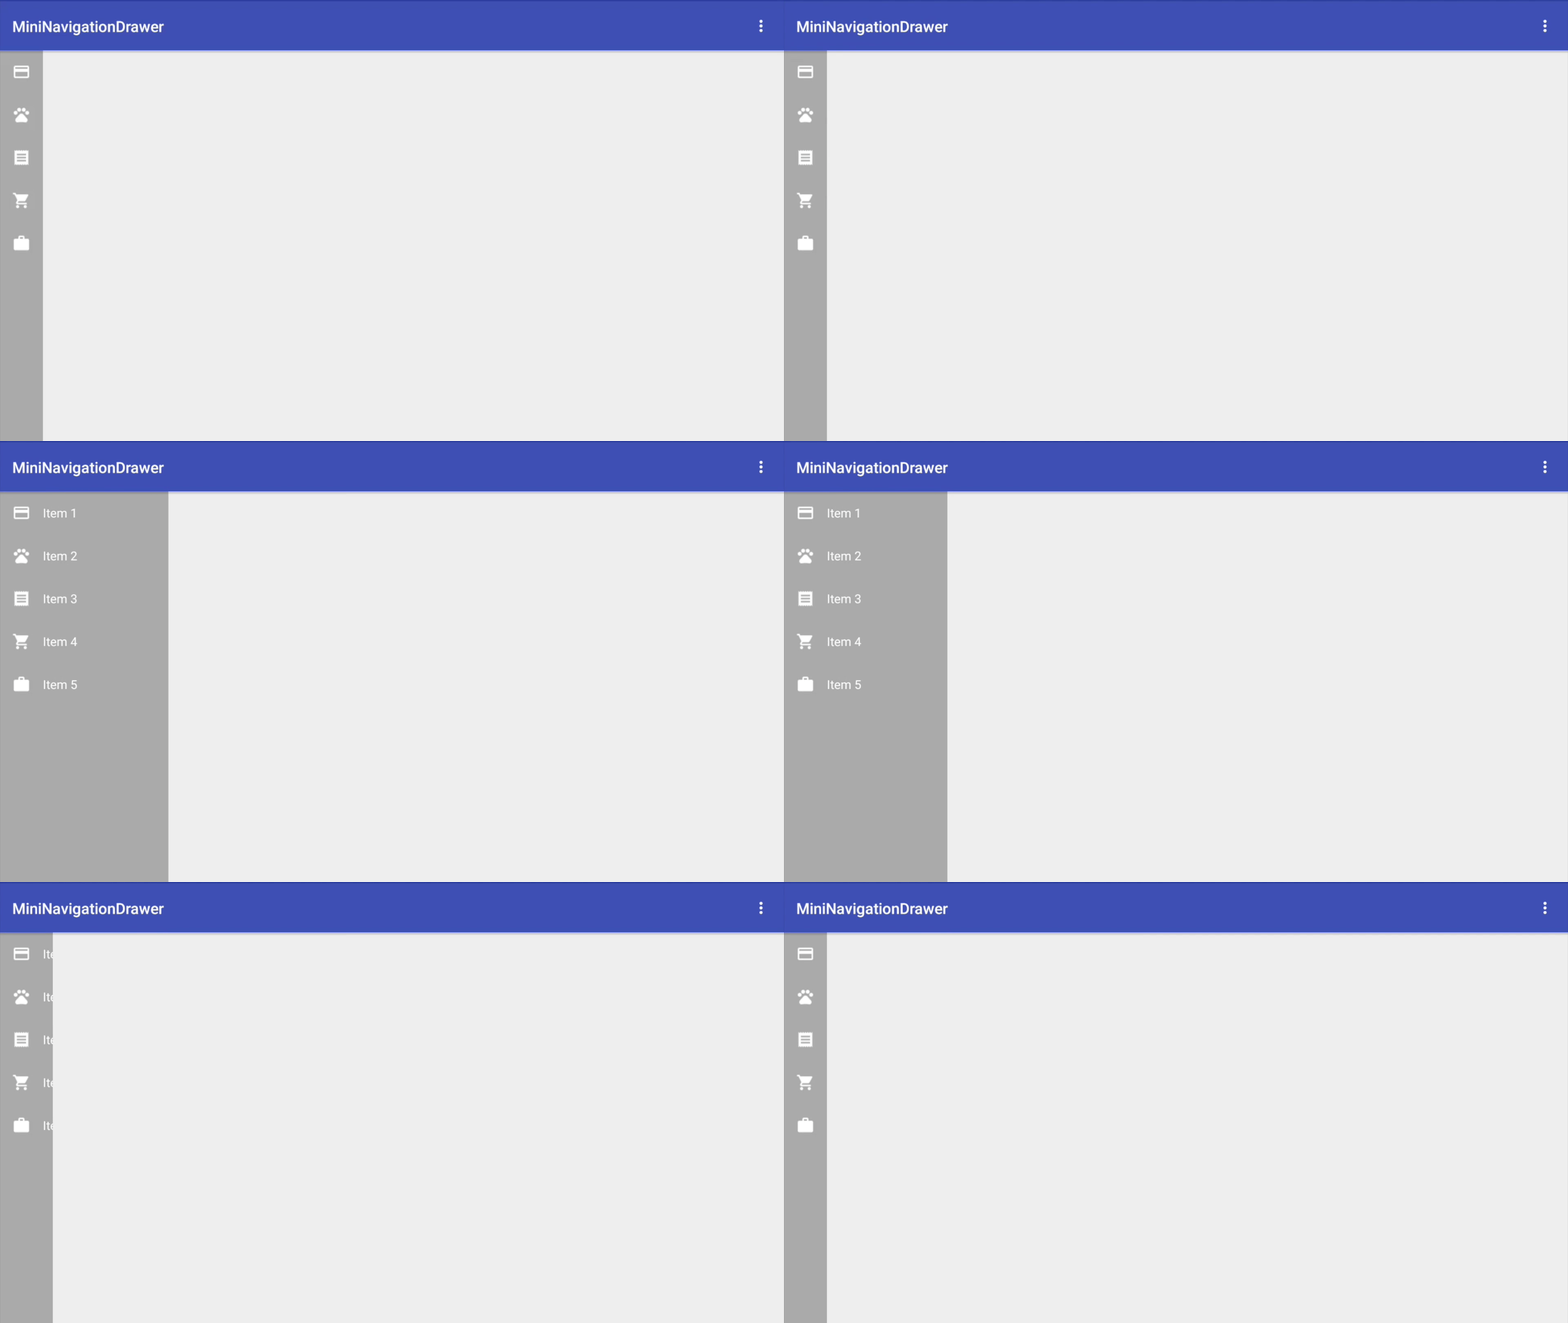
Run your project again and this time you should see the menu icons on the left of the screen.
title for image

Mini navigation drawer

And there you have it! The mini navigation drawer is perfect for making menu options easily accessible to the user. If you want to try out the mini navigation drawer you can download the sample project!